Create Virtual Machines using VirtualBox 7.0, cont.
INSTALLING VIRTUALBOX
Like most software, you can install Oracle VirtualBox from the command line or by using the Software Center to find and install it. Assuming that your OS is using the current kernel, you will be looking for virtualbox-current. If you're using the LTS kernel, you'll get virtual-box . For example, in a terminal: sudo eopkg it -y virtualbox-current.
Now you should be able to find Oracle VirtualBox in the System section of your main menu.
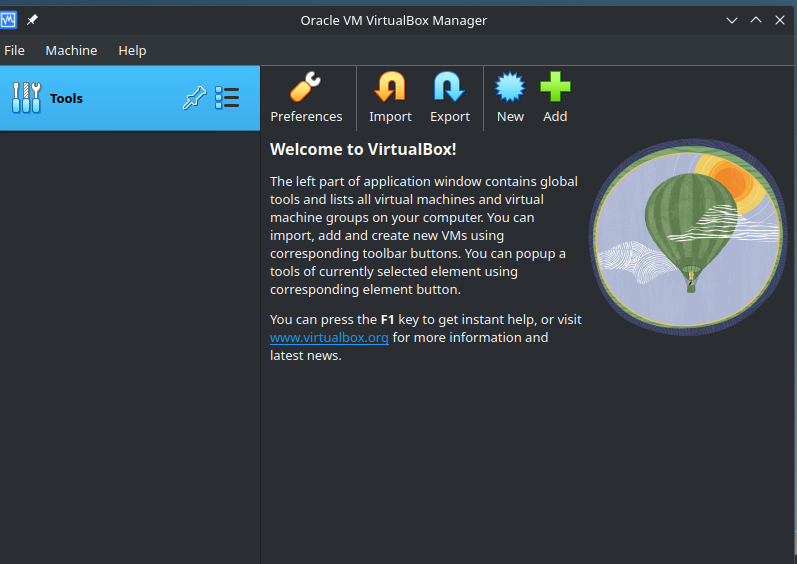
The large empty space on the left (under Tools) is where your VMs will be listed after you've created some. The space at the right, which now contains a welcome message, is where the machine properties of the currently selected VM in that list will be displayed.
WORKSPACES
Although not strictly required, I seriously recommend that you use virtual desktops (workspaces) as you work with VMs. If you haven't installed any from your DE yet, here are some hints that should help.
If you're using Budgie, right-click the desktop and select Budgie Desktop Settings. In the Bottom Panel section, click to add an applet, and scroll to the bottom of the applets list. From there you can install the Workspace Switcher applet, which you'll use to select a place to work. Budgie automatically places that applet in the center of your bottom panel, and starts it out with 4 workspaces. The GNOME DE provides automatic workspaces by default, but you might want to go to the Multitasking section of System Settings and create a few fixed workspaces. In MATE, you right-click the bottom panel and select the +Add to panel item in the context menu. From the list of applets that appears, scroll to the bottom and select the Workspace Switcher applet. If you want to change its location after it's installed, right-click on the switcher and select Move. Then you can drag it to the center of the panel, and click the mouse to leave it there. For Plasma, the virtual spaces are defined in the Workspace Behavior section of the System Settings. When you're satisfied with the number of workspaces, and optionally have given them names, click [Accept]. The workspaces will now appear on the left end of the bottom panel. Right-click on the panel and select Enter Edit Mode. Add a couple of panel spacers and rearrange the contents of the panel as you want them. Then click the Configure Display Settings... item at the top of the screen to exit edit mode and return to the terminal.
JOIN THE VBOXUSERS GROUP
You'll want your user to be a member of the vboxusers group that VirtualBox created when it was installed. This will enable some additional options as you work with VirtualBox. I'm sure that Linux provides multiple ways to this, but an easy way is simply to add your user's name to that entry at the bottom of the file /etc/group. You can use any command-line editor that you're familiar with (pico, nano, mousepad, micro, etc.) to edit that file.
If you're not familiar with such an editor, I strongly recommend that you install micro, and use that editor. You can install it from the command line like this: sudo eopkg it -y micro. Then you can use it like this to edit that group file: sudo micro /etc/group. Scroll down to the bottom of the file, and you should find this group name there.

Add your name where I've added jerry on the vboxusers line, then use Ctl+S to save the file and Ctl+Q to quit micro and exit back to the command line.
CREATE A VM
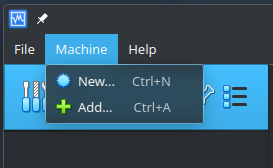
In the Machine menu at the top of the manager's screen, click the New item. That will start the wizard that helps you to create a new VM.
Here's the first page of that wizard.
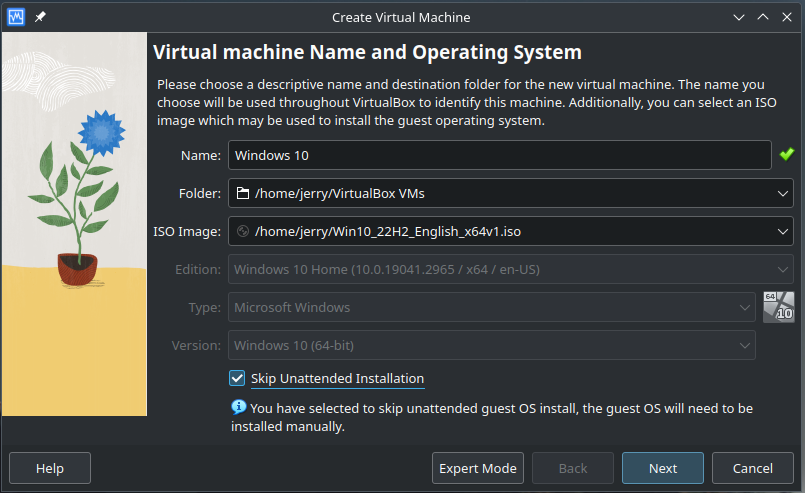
There are three things you'll need to enter here. Type Windows 10 in the Name field, then in the ISO Image field, select the .ISO file that you downloaded from Microsoft. Finally, check [ ]Skip Unattended Installation so your learning experience will match this tutorial. Notice that VirtualBox is smart enough to deduce from the .ISO name the Edition, Type, and Version of the VM that will be created. It won't let you change these fields.

Note that if you want to create a Linux VM, you'll need to manually select Linux as the type. It will then default to Oracle Linux, which you'll want to change to this selection near the beginning of the list. This will work well for most distros that are not important enough to be listed by name, including Solus.
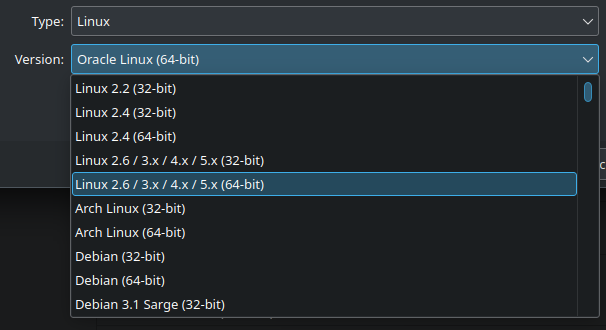
The result will look like this. VirtualBox won't know enough about that .ISO file to offer unattended installation, but you probably wouldn't want that, anyway.

This has been an interesting diversion, but now it's time to return to our Windows VM in progress, and click [Next].
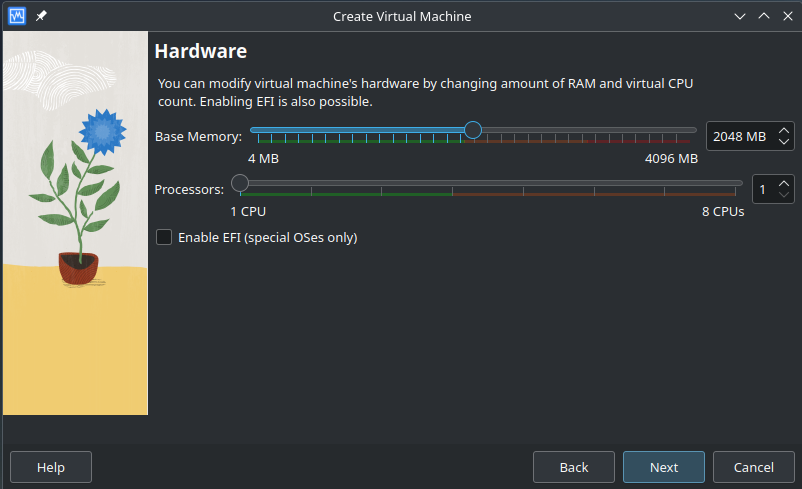
For the purpose of capturing these images, this example is being created on my Solus Plasma VM, which was never really intended to be a host for other VMs. It only shares 4 GB of memory and 4 CPU cores with its host VM, so the suggested values here are quite small. If your host has better resources than this host VM does, consider increasing those values. When I create VMs on this laptop, I usually assign 4 cores and 4 GB of memory -- just what this VM has. Once you've adjusted these values appropriately, you can click [Next] to continue.
Hint: Assigning 4 MB of RAM to a VM gives that VM exclusive access to that much of the host's memory. Other resources, such as a network controller or processor cores, can be shared with the VM, but a host and its client obviously can't both use the same area of memory at the same time. And speaking of processor cores, changing from 1 to 2 improves performance significantly. Because of the overhead associated with context switching though, changing it to three cores produces only a smaller increase. And so on, as you add more cores, up to the maximum that are available. So, for many VMs, two cores provide plenty of performance. Four cores represent luxury.
Next comes the Virtual Hard Disk definition. We already know that Windows is a pig, so it shouldn't surprise anyone to see that the default here is 50 GB. For a Windows VM, that's miserly. A Windows 11 default is 100 GB. For a Linux VM it would have defaulted to 8 GB, which I always increase to 32 GB.
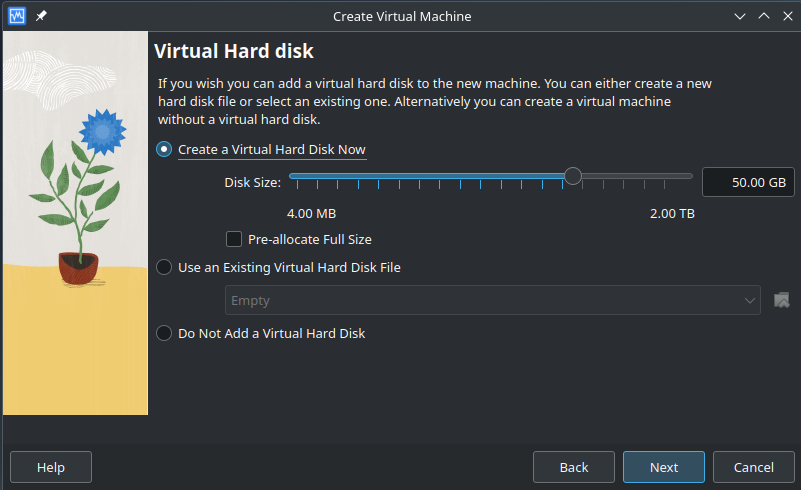
Hint: It's worth remembering that this virtual disk will start out considerably smaller than that -- about half that size, actually. If you ever want to increase performance by allocating the full disk size from the get-go, you can check the box for [ ] Pre-allocate Full Size, but unless you have a special reason to do that, don't. Modern virtual disk drives have evolved to where there's almost no difference in performance, compared with fixed disks, and your VM may never need that much of its host's disk drive anyway. In fact, it might never outgrow its initial size.
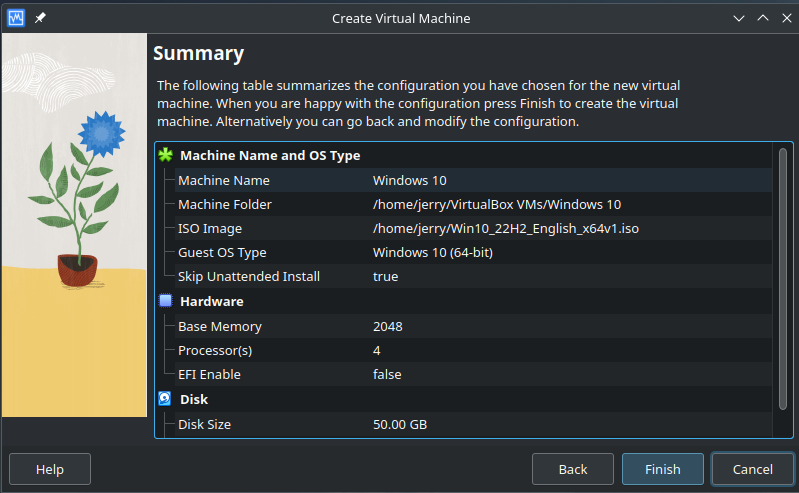
The last page of the wizard is simply a summary of the settings that have been created so far. This is your last chance to go back and fix anything that might not look right to you.
When you click [Finish], you're done with creating the virtual hard drive and defaulting a few of the VM's settings. Next, you're taken back to the VirtualBox manager application.
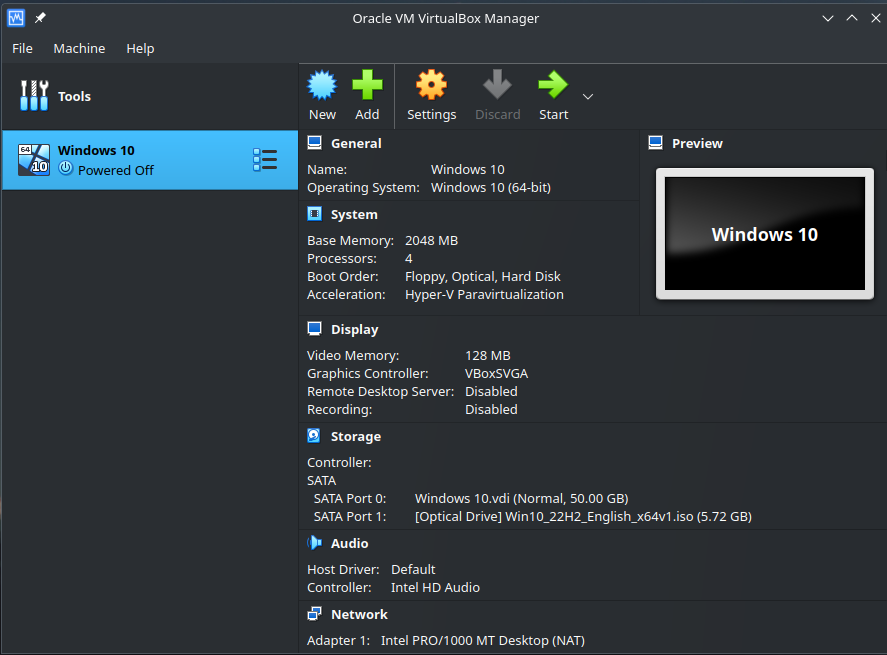
Now your new VM actually exists, so it's listed in the area on the manager's left. Since it's currently selected, the settings that have so far been set (or were defaulted) are listed in the area to the right. Next, we'll finish with the settings, and launch the VM to install its OS.
Open the Settings dialog next by clicking on the gear icon at the top. Despite having used a wizard to create the VM up to this point, there will be some changes for us to make here.
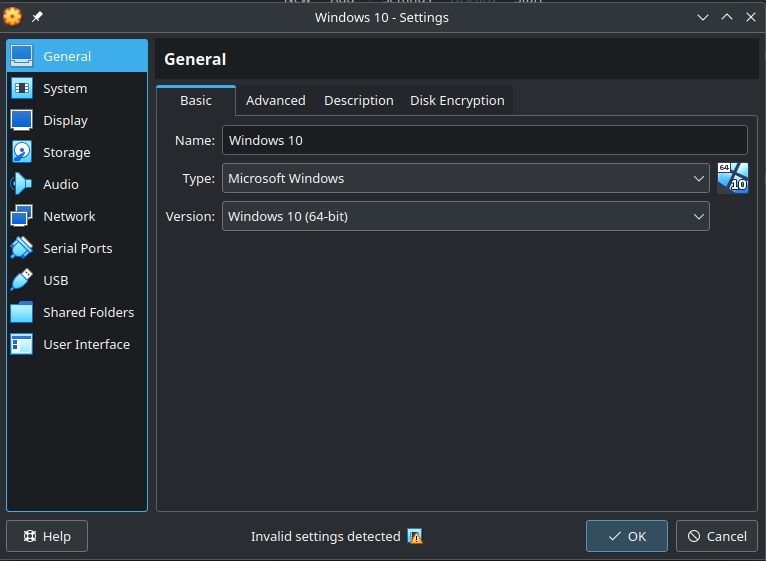
Hint: The nature of some of these settings is that they can be changed while the VM is in use, and others cannot. The ones that cannot will be grayed and inaccessible. The ones that can be, such as to place something in the virtual CD drive, will be normal in appearance and fully functional.
I find it very useful for the VM and its host to be able to share the clipboard. Being able to transfer data from one system to the other that was has been helpful on more than one occasion. If you would also find it useful, you can enable that feature by clicking the Advanced tab, then click that in the drop-down. I always choose the bidirectional option, but if you have a choice here. So far, I haven't needed to share any folders between host and VM, or enable Drag'nDrop, but those options are also available, in case you'd find them useful.
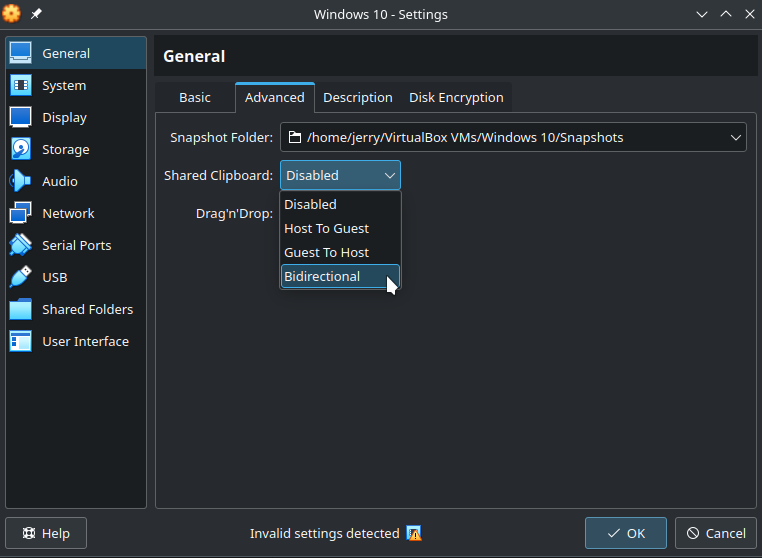
While you're in the Settings dialog, try to be curious. Take your time, look around and open tabs that you find interesting. You're building a computer here, and there a lots of options available from VirtualBox.
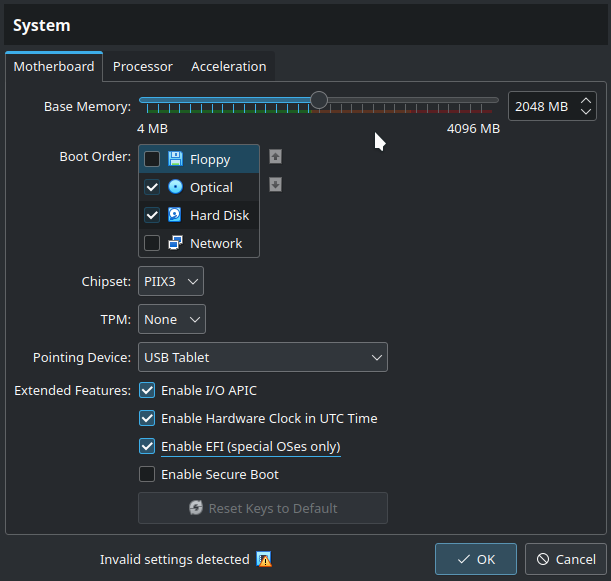
The System tab is where you can find settings that apply to the VM's "motherboard." As shown here, I always uncheck the floppy disk as a boot option, simply because I don't find it useful. The base memory has already been set. It's one of several settings that were available while using the earlier wizard to create the virtual disk drive, but if it needs adjustment as you build your computer, you can do that here. For some reason, the settings to enable UTC time for the system clock and to enable EFI are not set, even though they would be appropriate for a Windows VM, so those can be enabled here. You can also enable secure boot here, if you wan to, but I don't find that useful for my personal VMs, and I leave it unchecked as an unnecessary complication. As always, your choice may be different.
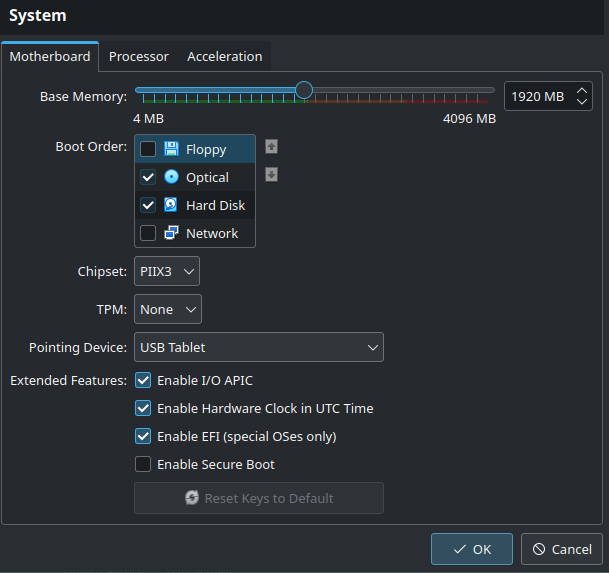
If you see that invalid setting warning appear while you're creating a VM, you can hover the mouse pointer over it to find out what VirtualBox thinks the problem is. Here's what it's concerned about in this case.

It's right, of course. So I gradually lowered that value until the warning disappeared. At 2 GB, it was concerned. At one step below that, it wasn't. Note that in the first message of this thread, I wrote about a VM's sharing resources with the host machine, and many resources can be shared, but I incorrectly wrote that the host can share its memory with the VM. It should be obvious to us all that memory is one resource that can't be shared, as this error has pointed out. When part of a host's RAM is assigned to a VM, it's no longer available to the host. Usually that's not a concern, but if multiple VMs are being run at the same time, or if the host's memory is very limited (as it is here), it can be very important. I wanted to go back to that first message and make sure that this was clear there as well, but I wasn't allowed to edit it.

Remember, this VM is being created on a VM as its host, so that I can use Spectacle on my laptop (where I'm creating this tutorial) to capture images of the VM I'm creating. I wanted to use this opportunity to point out the quality of VirtualBox as a product. It will do its best to guide you as you create a VM, and try to keep you from making any mistakes. So if you see such a warning, be sure you check what it's about.
Hint: On rare occasions, VirtualBox's concern is misplaced. For example, when I create most Linux VMs, it tells me that the VBoxSVGA video controller is an invalid setting, and I should be using the VBSVGA controller instead. (We'll discuss those in the next section.) For example, here's what it thinks of that choice as it applies to my Solus Plasma VM.

But that's wrong, and I know it. Most Linux distros these days, including Solus, are quite happy using the newer VBoxSVGA adapter. It performs better, and it provides a more accurate list of screen resolutions than the older adapter does. (It includes 16:9 resolutions instead of 16:10 resolutions.) So, if you're sure the warning is a mistake, you can safely ignore it, but it's always important to check.
With the choices here now all valid, and the memory size warning dealt with, it's time to click [OK] to continue.
Our next stop is the Display section, and here VirtualBox gets everything right for a Windows VM. Here you see that it considers that the VBoxSVGA video controller (mentioned above) is correct, as there's no warning about that here. It's one of the settings that was defaulted based on the earlier choice of a Windows .ISO file.
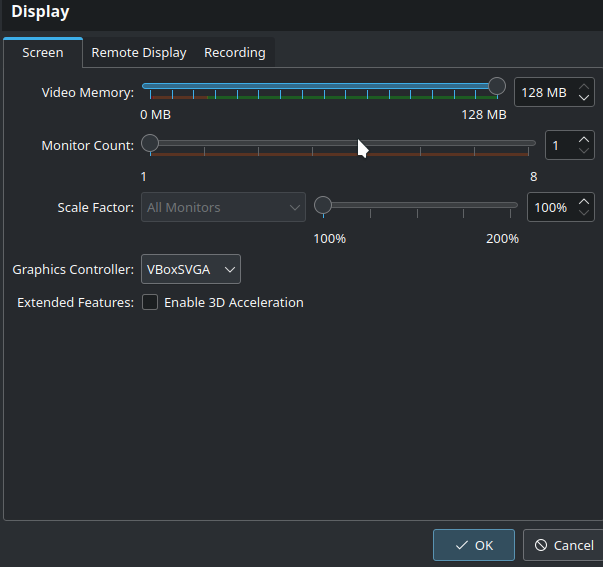
Hint: This is another example of Windows' appetite for resources. When I create a Linux VM, the video memory always defaults to 16 MB. I always wonder whether that's really enough, so I increase it to 32 MB, which is still a trivial amount, given the total amount of video memory that's available. But a Windows VM always uses all 128 MB's by default.
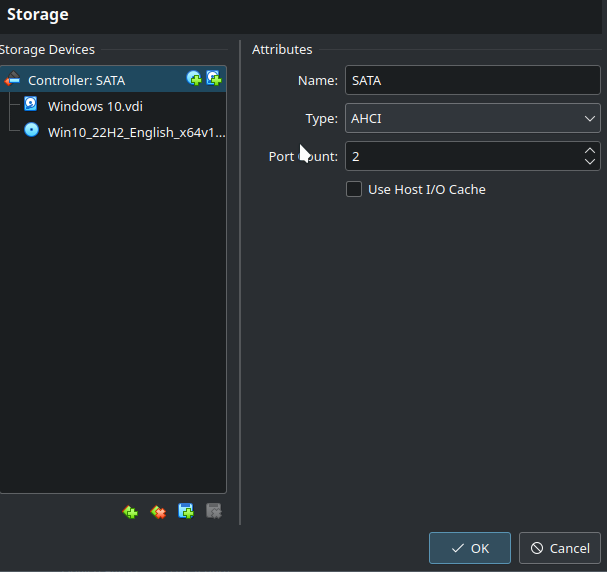
The next section is Storage, and it's here that we see both the contents of the hard disk and the CD drive, both of which are connected to the SATA controller in the case of a Windows VM. (A Linux VM assigns the hard disk to SATA and the CD drive to an IDE controller, for some reason. That seems a bit old-fashioned to me, but I've never changed it, and it's always worked just fine.) The default virtual hard disk is the one we created in a very early step in this process, and gave it the name Windows 10. The virtual CD drive contains the .ISO file we selected at that time. Although there's nothing to change here now, we'll return to this section when the OS installation has completed, and click on the CD drive contents. That will allow us to remove that .ISO file, and leave the CD drive empty when we restart the VM, so it doesn't start the installation all over again. When an OS is installed on hardware, that removal step is sometimes done automatically, but for some reason it's never done after an installation on a VM until we do it here. So, nothing to do here now, and we move on.
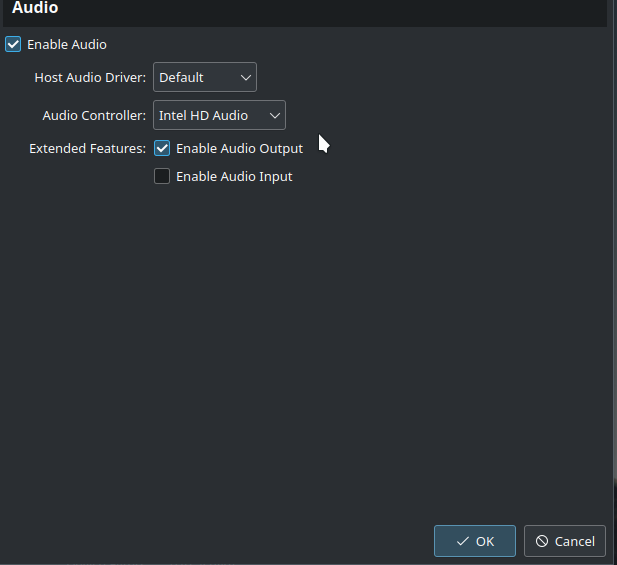
I always skip over the Audio section, because I'm always happy with the defaults for a VM. Just click [OK].
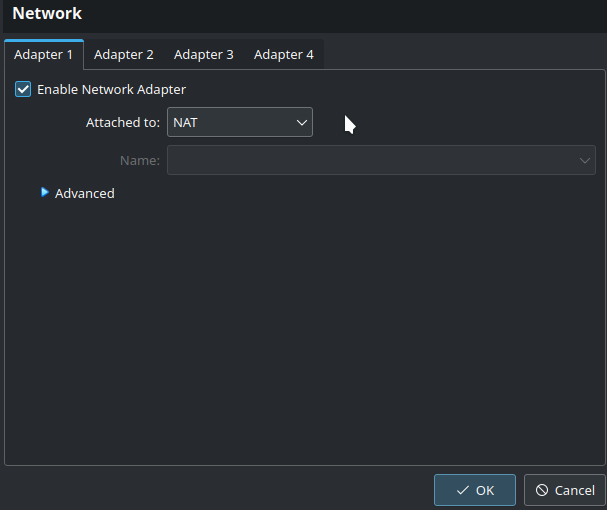
The Network section is another one we can ignore for the purposes of this VM.
The rest of the sections can also be safely ignored for now. Serial ports aren't relevant for us, and the rest of the settings sections have perfectly good defaults. So a click on [OK] from here closes the settings dialog and takes us back to the main VirtualBox Manager screen. Here, I right-click on the VM and from its context menu I click the option to create a shortcut for this VM on the desktop. Although I can launch the VM from here with the manager window, I prefer to move to the empty workspace next door, and do that there. The shortcut immediately appears on the screen, like so.

Now it's time to do what I've come here to do: install Windows 10 on the VM I've just created. So I change to the empty workspace next door to this one, and click on that shortcut icon.
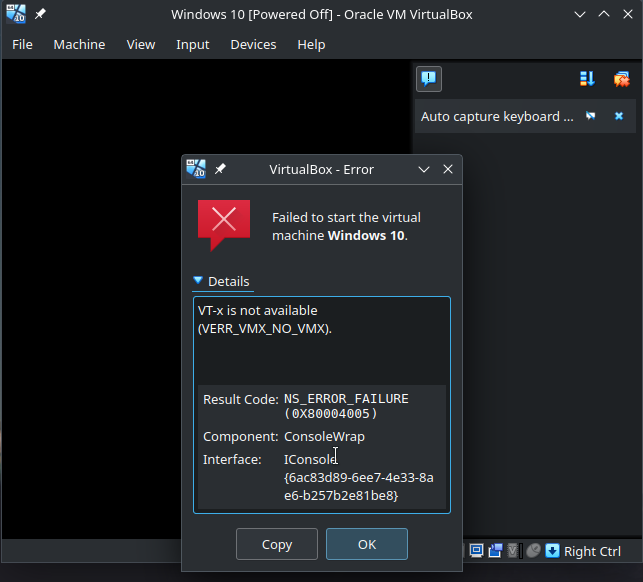
Unfortunately, this is where the folly of trying to build a VM on a VM catches up with me, but that's okay. Although I can't run this VM, the build process worked just fine, so I was able to document that. At this point, if I had been able to launch the VM it would have started with Microsoft's Windows installer, and worked its way through all the steps of installing Windows on this VM. (With Windows, that's a long process, indeed.)
Everyone reading this has probably been through that process, and some of you many times, so although this is disappointing, being able to actually run this VM would have come as a surprise. You know what to do from here on out, even though I can't show it to you. Don't forget that after installation on a VM, the .ISO file needs to be removed from the virtual CD drive. So return for a moment to the VirtualBox manager window, click the gear icon to open the Settings dialog, open the Storage section, and take care of that. Just click on the .ISO file and set it to Empty. Otherwise when you try to launch the finished VM, it will be the installer that starts again. Having removed that .ISO file, a click on the Windows 10 icon will launch the VM itself, ready for you to use.