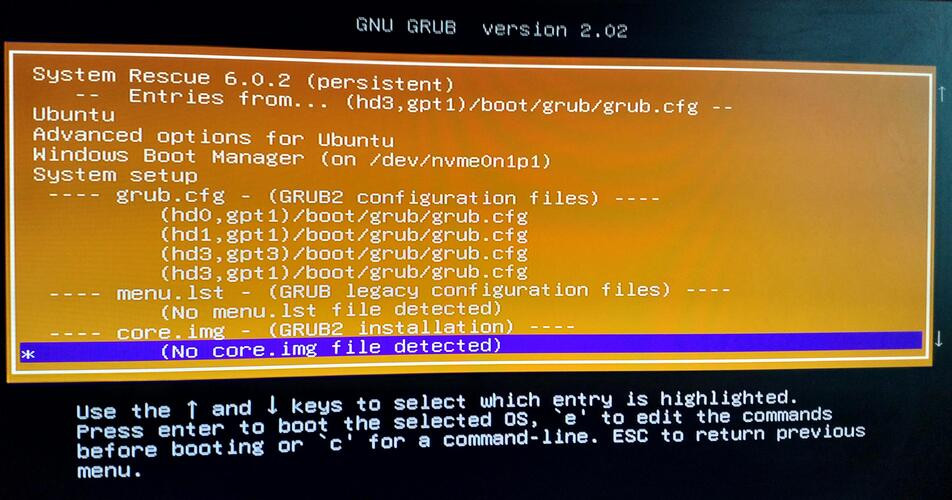
This relates to booting with EFI, if you are using a non-EFI system or using legacy boot with an EFI system it will not be of interest. The usual caveats apply, backup your ESP partition (I use fsarchiver) so you can restore it should you go wrong.
The idea is to get Supergrub onto the Solus menu so you can access other OSes using grub (or for me particularly I use it to be able to access System Rescue CD via the Solus boot menu, and will add a brief description how to do this at the end of this Tutorial)

Set timeout for Solus boot menu:
You need to be able so see your Solus boot menu, which I believe you can get to by hammering space bar on boot, but probably better to force it every time by giving it a time-out. So to give it a timeout of 10 seconds before it boots into Solus in your terminal type:
sudo clr-boot-manager set-timeout 10
If all is well you'll see
New timeout value is: 10
Download the Supergrub:
https://www.supergrubdisk.org/category/download/supergrub2diskdownload/super-grub2-disk-stable/
We want the EFI x86_64 stand-alone version, which is currently:
super_grub2_disk_standalone_x86_64_efi_2.02s10.EFI
Mount the EFI Partition:
In Solus mount your EFI partition (/dev/nvme0n1p1, /dev/sda1, etc - whatever is appropriate for your own setup)
sudo mount /dev/YOUR-ESP-PARTITION /boot
Place the Supergrub file on the EFI partition:
cd /boot/EFI
sudo mkdir supergrub
cd supergrub
sudo cp /PATH-TO-DOWNLOADED-FILE/super_grub2_disk_standalone_x86_64_efi_2.02s10.EFI .
Make your Menu config file:
Create a text file with the following contents (title can be what you want):
title Super Grub (version 2.02s10)
linux /EFI/supergrub/super_grub2_disk_standalone_x86_64_efi_2.02s10.EFI
Save it as Super-Grub-Disk.conf
Add Supergrub to the Menu:
sudo cp /PATH-TO-YOUR-CONFIG-FILE/Super-Grub-Disk.conf /boot/loader/entries/Super-Grub-Disk.conf
That's it when you reboot you should see a new entry "Super Grub (version 2.02s10)". Choose this entry and then select Detect Operating Systems (which, depending on the number of disks and complexity of your system, may take a good many seconds) to see your grub boot choices.

Hope this is of some use. Greetings from Scotland.
A Use case example to make System Rescue CD available:
Create a folder called /boot/grub/ on a partition on one of your hard disks (grub looks for config files on each hard disk in this folder).
Create in there a grub.cfg file
I'm not going to go into this in detail but will show you the config files I use below, you'll need to change paths, and img_label to suit your own setup:
For documentation on SystemRescueCD boot parameters see:
http://www.system-rescue-cd.org/manual/Booting_SystemRescueCd/
Volatile System Rescue (no session changes saved):
menuentry "System Rescue 6.0.2 - Volatile"{
search --no-floppy --fs-uuid --set UUID-OF-DISK-WHERE-ISO-RESIDES
set iso="/boot-isos/systemrescuecd-6.0.2.iso"
loopback loop $iso
linux (loop)/sysresccd/boot/x86_64/vmlinuz img_label=DISK-LABEL img_loop=/boot-isos/systemrescuecd-6.0.2.iso archisobasedir=sysresccd earlymodules=loop rootpass=xxxxxxx vncserver=1:xxxx eth0=192.168.1.2 setkmap=uk isoloop=/$iso copytoram
initrd (loop)/sysresccd/boot/x86_64/sysresccd.img
loopback --delete loop
}
Persistant System Rescue (keeps session changes):
I've given System Rescue it's own small partition to store it's persistant changes and the ISO itself as I find that easy to manage, but a designated folder on an existing disk will do just as well. The _cow__ entries are what makes it persistent. Again see System Rescue documentation mentioned above.
menuentry "System Rescue 6.0.2 (persistent)"{
search --no-floppy --fs-uuid --set UUID-of-DISK-WHERE-ISO-RESIDES
set iso="/systemrescuecd-6.0.2.iso"
loopback loop $iso
linux (loop)/sysresccd/boot/x86_64/vmlinuz cow_label=sysrescue cow_directory=/sysrescue img_label=sysrescue img_loop=/systemrescuecd-6.0.2.iso archisobasedir=sysresccd earlymodules=loop rootpass=xxxxxxxxxxx vncserver=1:xxxxxxxx eth0=192.168.1.2 setkmap=uk isoloop=/$iso copytoram
initrd (loop)/sysresccd/boot/x86_64/sysresccd.img
loopback --delete loop
}